Quickstart
Installation
Execute this command on your MacOS Terminal / Linux Shell / Windows PowerShell:
$ pip3 install profiles-rudderstack
$ pip3 install profiles-rudderstack -U
As a prerequisite, you should have installed Python3 and set its environment variables.
To verify that you’ve installed the latest version (0.10.4), execute this command after installation is complete:
$ pb version
If you face issues then check out the section Setup & Installation.
Note
In case you are an existing user, then you’ll have to migrate your project to new schema. Please refer the section Migrate your existing project.
Warning
To install PB, the Python version must be between 3.8 and 3.10.
Set WH Connection
Data warehouse details and credentials are specified in the connection file. You can create it using the command:
$ pb init connection
This will ask you to input connection details and will then store them in the file siteconfig.yaml inside .pb folder of user’s home directory (~/.pb), under the YAML node connections.
First, you will have to select the warehouse you’re creating connection for (‘s’ for Snowflake, ‘r’ for Redshift). Then, enter the following details:
Connection Name: Assign any name here such as
test,prodprofile, etc. It will be specified in PB Project file, as mentioned below.Target: This refers to the environment, such as dev, prod, test etc. You can use any term in a target (eg. dev1, dev2, dev3 etc.) and create separate connections for them.
User: Data Warehouse user you will create to provide necessary privileges.
Password: Data warehouse password for the user.
Role: Role you will have to create with necessary privileges. This is the role that should be associated with the user.
Account: An example is abx182.us-east-2. To know about account identifier, click here.
Warehouse: Name of the warehouse.
Database name: Name of the database inside warehouse where model outputs will be written.
Schema: Name of the schema inside database where you’ll store ID stitcher and entity features.
Connection Name: Assign any name here such as
test,prodprofile, etc. It will be specified in PB Project file, as mentioned below.Target: This refers to the environment, such as dev, prod, test etc. You can use any term in a target (eg. dev1, dev2, dev3 etc.) and create separate connections for them.
Host: An example is warehouseabc.us-west-1.redshift.amazonaws.com. To know about host, go to the AWS Console and select your cluster under Clusters.
Port: Port number to connect to warehouse, e.g. 5129.
Database name: Name of the database inside warehouse where model outputs will be written.
Schema: Name of the schema inside database where you’ll store ID stitcher and entity features.
User: Data Warehouse user you will create to provide necessary privileges.
Password: Data warehouse password for the user.
Host: The hostname or URL of your Databricks cluster (e.g. a1.8.azuredatabricks.net).
Port: The port number used for establishing the connection. Usually it is 443 for https connections.
http_endpoint: The path or specific endpoint you wish to connect to.
access_token: The access token created for authenticating the instance.
User: Username of your Databricks account.
Schema: Schema in which your output tables/views will be stored.
Catalog: The database or catalog having data that you’ll be accessing.
For establishing a successful connection, please ensure that the information entered is accurate.
Note
To enable access, make sure you are an ACCOUNTADMIN, or have an account that has READ and WRITE privileges. For more information, refer the section Access Control.
Create Your First Project
Instantiate Hello World project using:
$ pb init pb-project
This will create a seed project in folder HelloPbProject. Navigate to that folder in Terminal:
$ cd HelloPbProject
Now, edit the file pb_project.yaml. A sample project file is shown below:
# Project name

name: sample-attribution


# Project's yaml schema version.

schema_version: 49


# WH Connection to use.

connection: test

# Whether to allow inputs having no timestamps,
# if true, data without timestamps are included when running models

include_untimed: true


# Model folders to use.

model_folders:
  - models # Name of subfolder inside your project folder, that contains YAML model files


# Entities in this project and their ids.

entities:
  - name: user
    id_types:
      - user_id
      - anonymous_id
      - email
packages:
  - name: corelib
    url: "https://github.com/rudderlabs/rudderstack-profiles-corelib/tag/schema_{{best_schema_version}}"
name: Give name of your project.
schema_version: No need to change it right now (we’ll come to that later).
connection: The warehouse connection you are going to use (see the Set WH Connection section above).
include_untimed: Set it to true to include source data that do not have any timestamp values. If you set it to false then all values with null values in
occurred_at_colwill be excluded.model_folders: Relative path where your model files are stored. You can keep it untouched.
entities: All the entities that will be used in this project. Different entities can reuse same ID types.
name - Set it to user.
id_types - Enlist the type of data to be used for creating ID stitcher / Entity Features. Such as anonymous id’s that do not include the value “undefined” or email addresses in proper format.
packages - Library packages can be imported in project signifying that this project inherits its properties from there
name - Give any friendly name.
url - If required then you can extend the package definition such as for ID types.
Note
For debugging, you may refer the section YAML.
Inputs Model
The file models/inputs.yaml contains details of input sources (such as tables / views), from which data is to be fetched.
Names are assigned to input sources, which can be used for creating specifications (see the next file).
Here’s an example of inputs model file.
inputs:
  - name: rsIdentifies
    contract:
      is_optional: false
      is_event_stream: true
      with_entity_ids:
        - user
      with_columns:
        - name: timestamp
        - name: user_id
        - name: anonymous_id
        - name: email
    app_defaults:
      table: rudder_events_production.web.identifies
      occurred_at_col: timestamp
      ids:
        - select: "user_id"
          type: user_id
          entity: user
          to_default_stitcher: true
        - select: "anonymous_id"
          type: anonymous_id
          entity: user
          to_default_stitcher: true
        - select: "lower(email)"
          type: email
          entity: user
          to_default_stitcher: true
  - name: rsTracks
    contract:
      is_optional: false
      is_event_stream: true
      with_entity_ids:
        - user
      with_columns:
        - name: timestamp
        - name: user_id
        - name: anonymous_id
    app_defaults:
      table: rudder_events_production.web.tracks
      occurred_at_col: timestamp
      ids:
        - select: "user_id"
          type: user_id
          entity: user
          to_default_stitcher: true
        - select: "anonymous_id"
          type: anonymous_id
          entity: user
          to_default_stitcher: true
inputs - List all of the input sources along with the SQL for fetching them.
name - Give a name in which you will store the fetched data.
contract - A Model Contract provides essential information about the model, including the necessary columns and entity ID’s it must contain. This is crucial for other models that depend on it, as it helps find errors early and closer to the point of their origin.
is_optional - This flag indicates whether the model’s existence in the warehouse is mandatory or not.
is_event_stream - This identifies whether the table or view represents a continuous series of event or not. A model is an event stream model if and only if it has a timestamp column.
with_entity_ids - This is the list of entities’ with which this model is related. A model M1 is considered related to model M2 if there is an ID of model M2 among M1’s output columns.
with_columns - It provides a list of all columns that the model should have.
app_defaults - Values the input defaults to, when the project is run directly. For library projects, inputs can be remapped and appdefaults overridden, when library projects are imported.
table - Source table in warehouse that you are fetching the data from.
occurred_at_col - Timestamp column in the source table.
ids - List of all the ID’s that will be fetched.
select - These are ID Stitching input that compute column expression for knowing the ID of each row in the table.
type - These are IdEdgeSignals i.e. fields in different tables that are of the same type, so they can be stitched together.
entity - Entity to which the ID belongs to.
to_default_stitcher - Optional, it needs to be set to
trueexplicitly for an ID to get picked in the default ID stitcher (i.e. the project file doesn’t have the keyid_stitcher: models/<name of ID stitcher model>).
Note
The names of source tables mentioned in the inputs file are for reference purpose. Please change them to actual table names in your warehouse.
What is ID Stitching?
ID Stitching solves the problem of tying different identities together, for the same user across different sessions/devices.

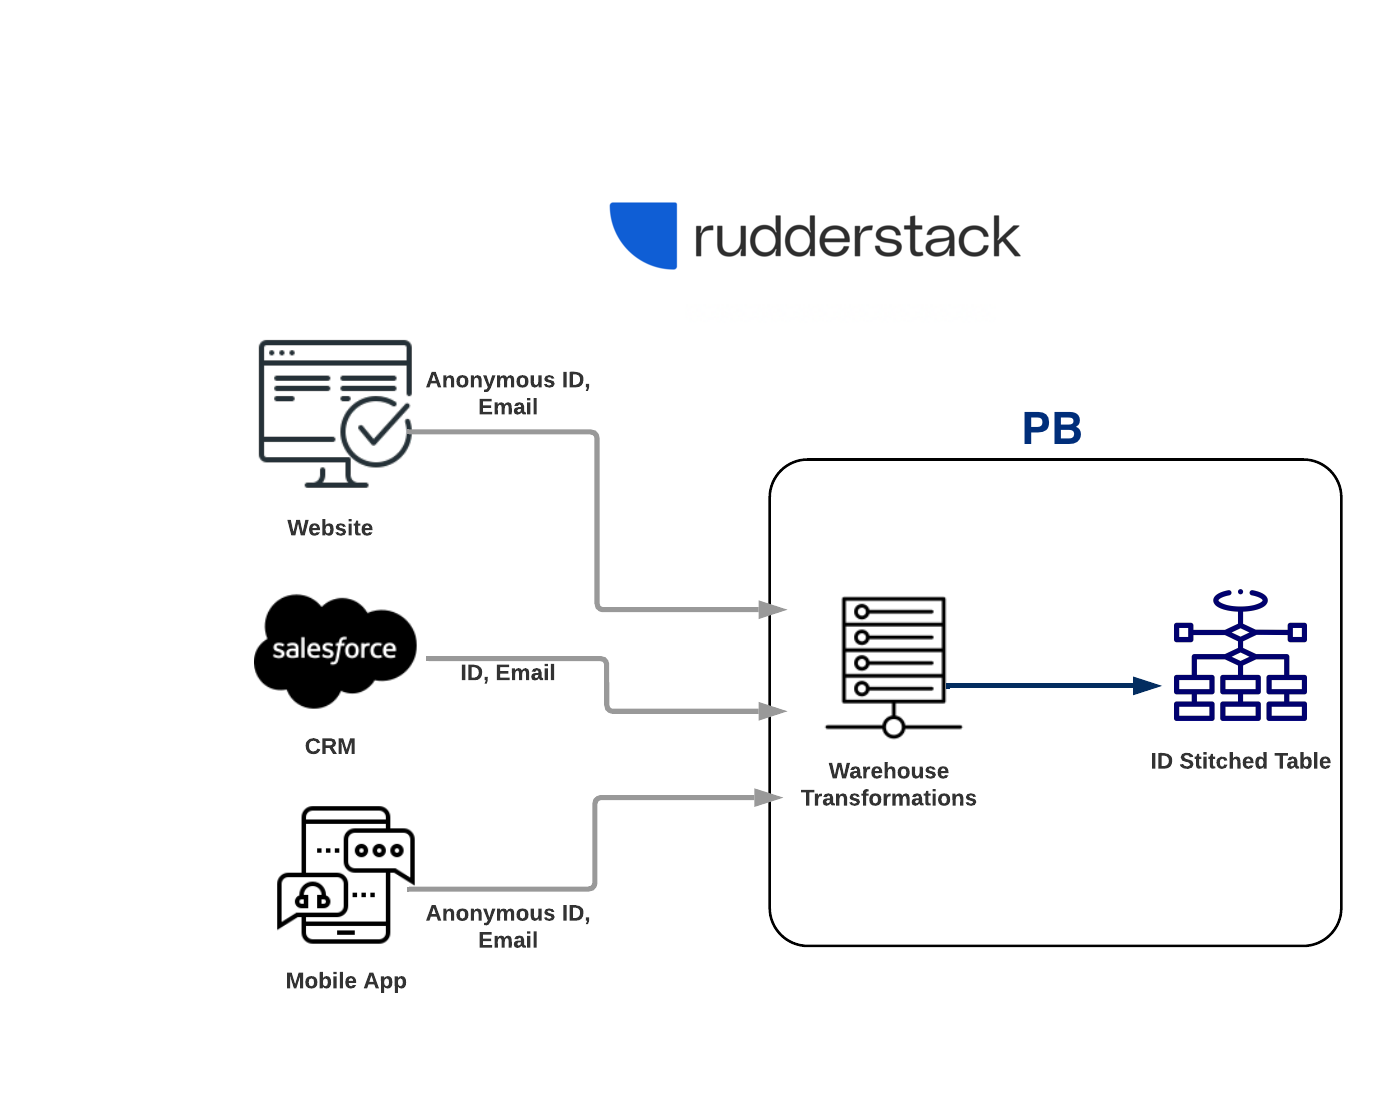
Let’s consider that in your data warehouse, you have data coming in from various sources. These sources may include your public website, mobile app, and SalesForce CRM. Now let’s assume you want to know about the ID’s of users that have browsed your website in private mode. You can obtain these missing links, by stitching the same fields together.
When you create a new project, then the section on ID stitcher is unspecified.
Reason for that is RudderStack creates a “default ID stitcher” behind-the-scenes, which reads from all input sources and ID types, to create stitched table.
You can view all the models in your project by executing pb show models or pb show dependencies commands.
Test that it’s valid
After saving the edited file, execute pb compile command.
If there is a compilation error you will see an error presented on the screen.
You can also find any errors in the logs/logfile.log file.
If there are no errors then it’ll generate SQL files in the output folder.
Test Connection Access
Execute the following command:
$ pb validate access
If you don’t get any error then it means you can read from the DW and create material tables on it.
Create ID Stitched Table
Creating ID Stitched Table
Once your projects successfully compiles you can now run your PB project.
In order to do this, simply execute pb run command to materialize the ID stitcher table.
In Terminal, you’ll be able to view the name of table created on the data warehouse.
Note
For detailed reference, check out the page Identity Stitching.
Viewing Generated Tables
Please use the view name user_default_id_stitcher (assuming you didn’t change the entity_key from user to something else).
Please use the same view name as the ID stitcher model defined in the file profiles.yaml of the project.
Even if there are multiple material tables, the view will always point to the latest generated table.
Follow these steps to log in to console and check out the generated tables:
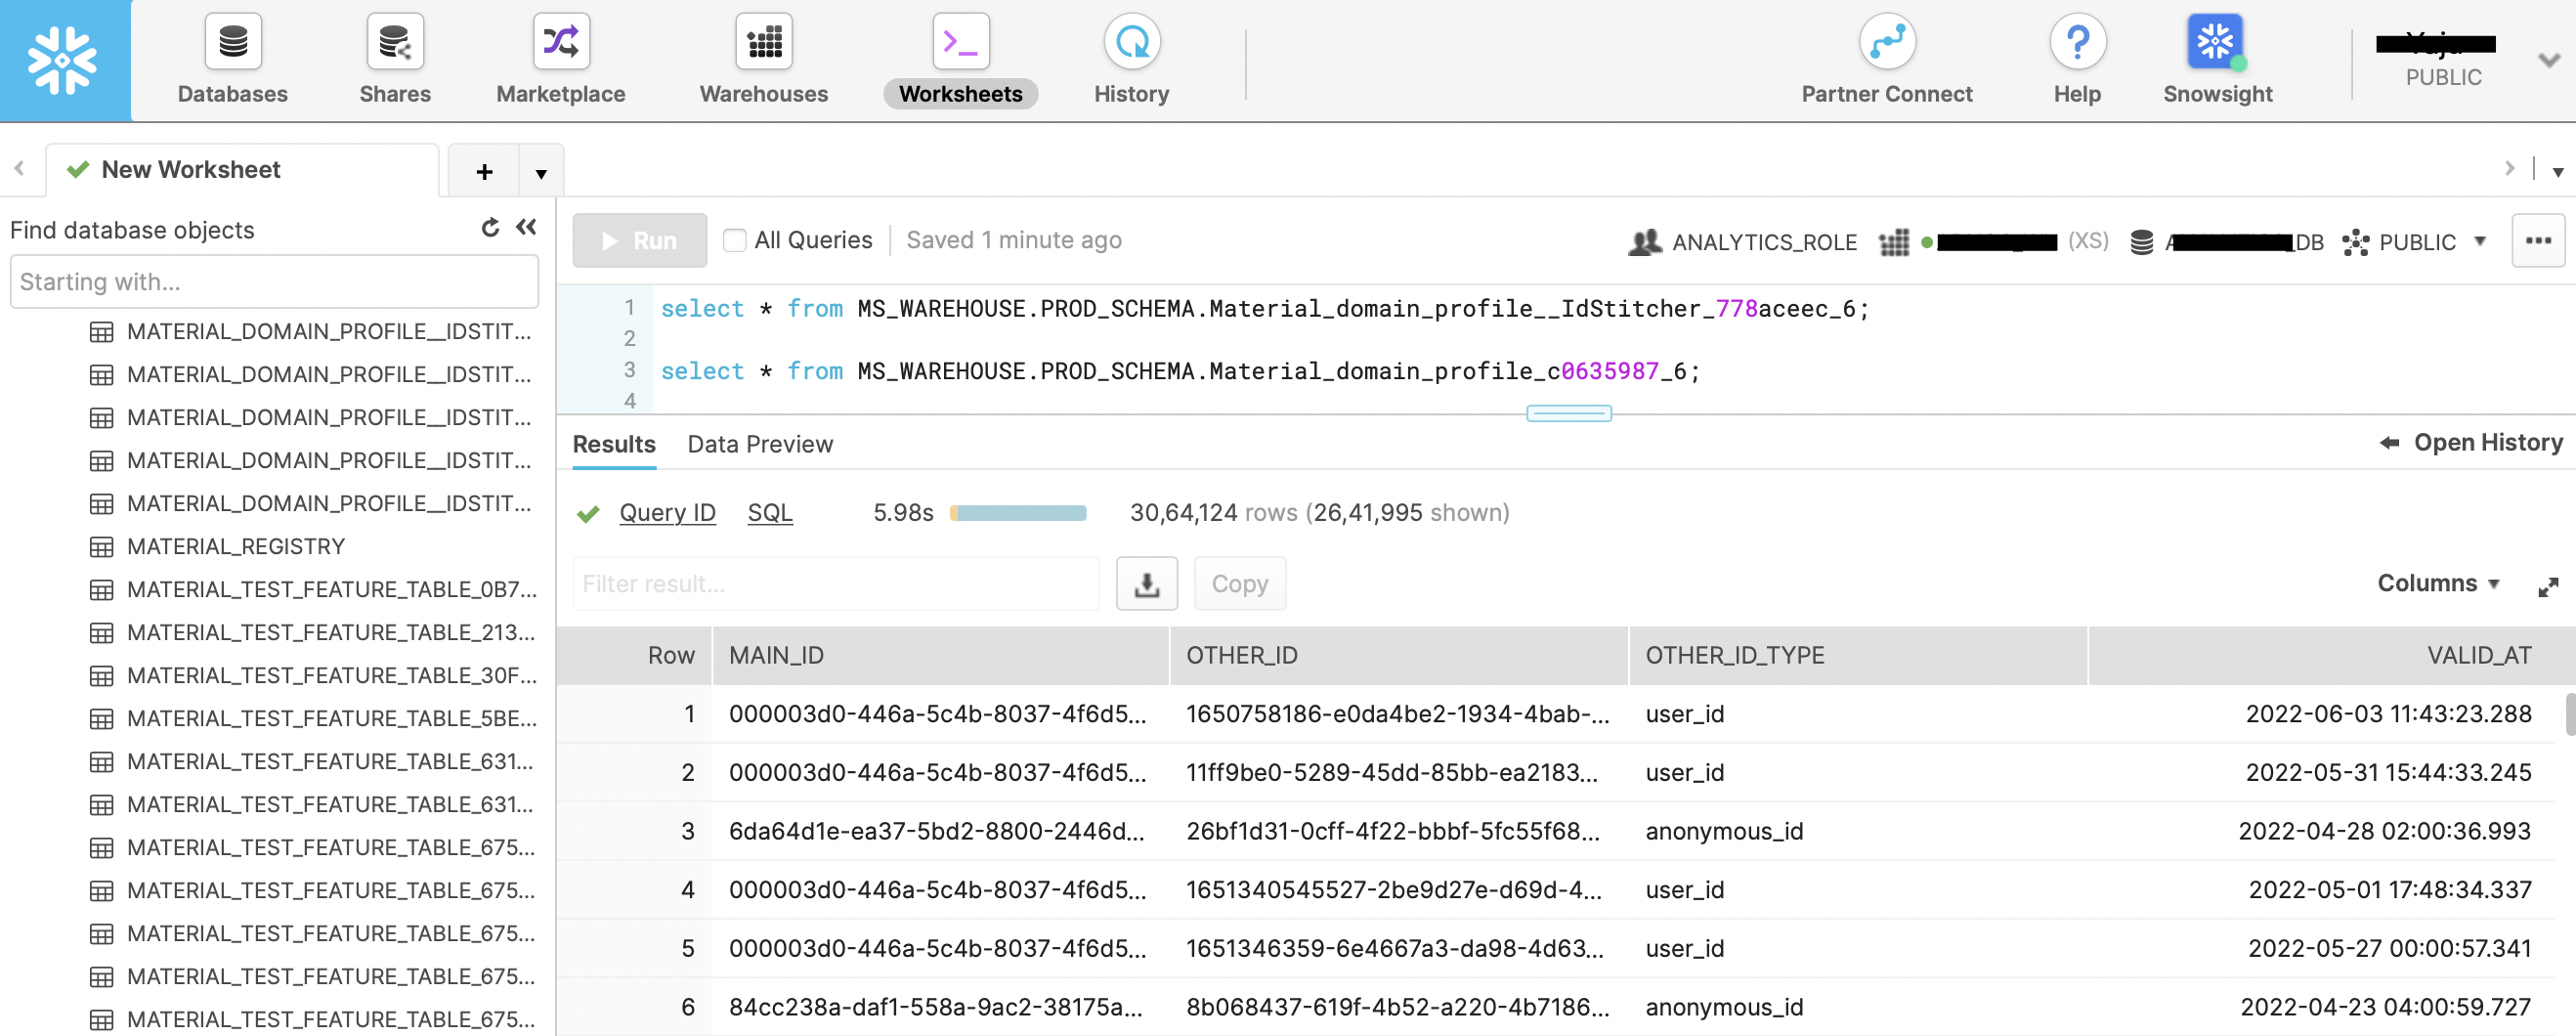
Open https://<account>.snowflakecomputing.com/console.
Enter your username and password.
Click on Worksheets in top navigation bar of the webpage.
On the left sidebar, you can click on the Database and the corrosponding Schema to view list of all tables.
Hovering on each table name will show you the full table name along with date and time it was created.
You can double click on the appropriate view name to paste the name on empty worksheet.
Then, you can prefix
select * frombefore the pasted view name and suffixlimit 10;at the end.Press Cmd+Enter, or click on Run button to execute the query.

Download a tool such as Postico2.
Create a new connection by entering all details. Click on Test Connection and then Connect.
Click on + next to Queries in left sidebar.
On the left sidebar, you can click on the Database and the corrosponding Schema to view list of all tables/views.
You can double click on the appropriate view name to paste the name on empty worksheet.
Then, you can prefix
select * frombefore the pasted view name and suffixlimit 10;at the end.Press Cmd+Enter, or click on Run button to execute the query.
Enter your Databricks workspace URL in the web browser and login with your username + password.
Click on the “Catalog” icon in left sidebar
Choose the appropriate Catalog from the list and click on it to view contents.
You will see list of tables/views. Click on the appropriate table/view name to paste the name on worksheet.
Then, you can prefix
select * frombefore the pasted view name and suffixlimit 10;at the end.Select the query text. Press Cmd+Enter, or click on Run button to execute the query.
To get Databricks connection details: select SQL Warehouse from left sidebar, and select the warehouse you intend to connect to. Select the tab “Connection details”. Note down Server hostname, Port, HTTP path.
To generate access token: Click on your username in top right and select “User Settings” in the drop down menu. Then, select “Developer” from left sidebar sub menu. Next to “Access Tokens”, click on the button “Manage” and then “Generate new token”.
You can get username from “Profile” in left sidebar sub menu and copy the string within brackets next to “Display name”.
Here’s what the columns imply:
<entity_name>_main_id: rudderId generated by Profile Builder. If entity_name is user then it’ll be named
user_main_id. Think of a 1-to-many relationship, with one rudderId connected to different IDs belonging to same user such as userId, anonymousId, email, phone, etc.other_id: ID in input source tables that is stitched to a rudderID.
other_id_type: Type of the other ID to be stitched (userId, anonymousId, email, etc).
valid_at: Date at which the corresponding ID value occurred in the source tables. For example, the date at which a customer was first browsing anonymously, or when they logged into the CRM with their email ID, etc.
Create Entity Vars
What are Entity Vars?
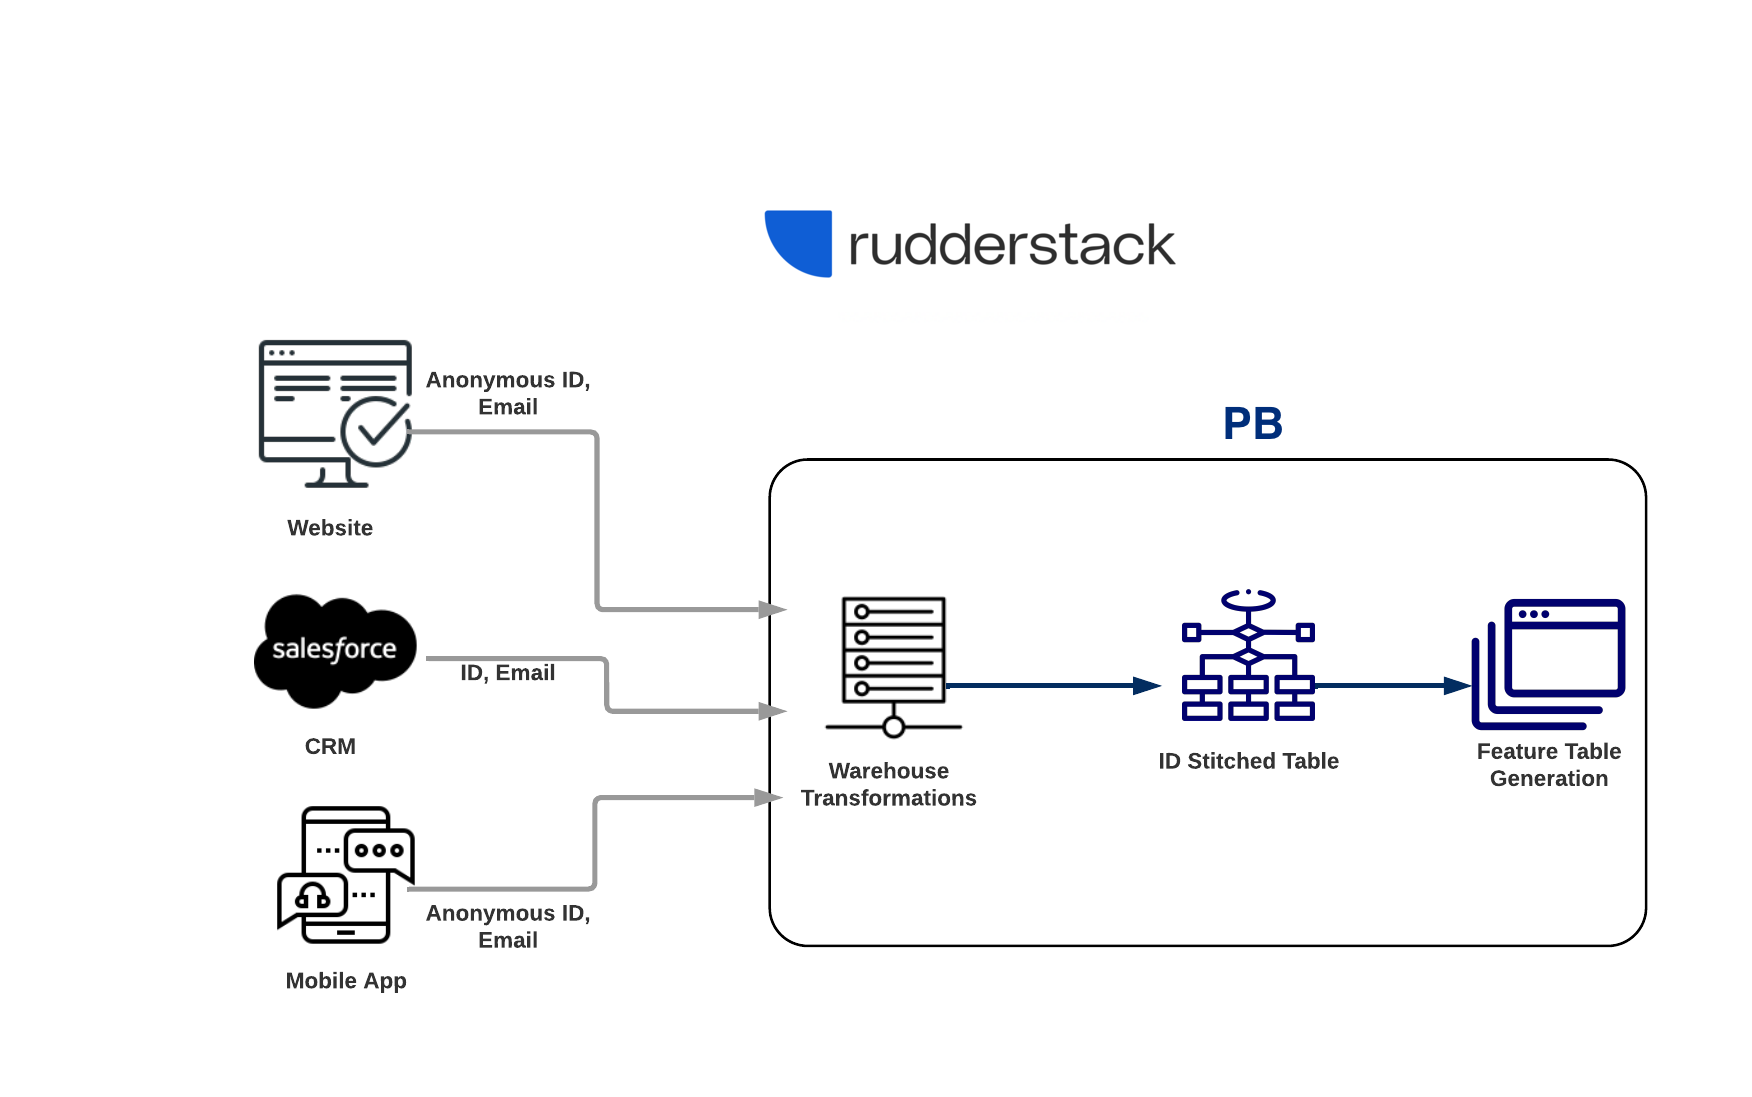
Entity Var is a single value per entity instance, derived by performing calculation or aggregation on a set of values. An Entity Var can also be defined as a Feature, that act as pieces of useful information. An Entity Traits 360 is a collection of all such features.

Modify ID Stitched Project
Let’s extend the previous example, where input data got stitched. Now, on top of that table, you want to get a var table created with these features:
Date a customer was last active.
Life Time Value of a customer.
Similar to ID Stitching, create your first PB var table using pb init pb-project, a sample of which is shown below:
var_groups:
  - name: default_vars
    entity_key: user
    vars:
      - entity_var:
          name: first_seen
          select: min(timestamp::date)
          from: inputs/rsTracks
      - entity_var:
          name: last_seen
          select: max(timestamp::date)
          from: inputs/rsTracks
      - entity_var:
          name: user_lifespan
          description: Life Time Value of a customer
          select: '{{user.Var("last_seen")}} - {{user.Var("first_seen")}}'
      - entity_var:
          name: days_active
          description: No. of days a customer was active
          select: count(distinct timestamp::date)
          from: inputs/rsTracks
models:
  - name: user_profile
    model_type: feature_table_model
    model_spec:
      validity_time: 24h # 1 day
      entity_key: user
      features:
        - user_lifespan
        - days_active
Here are the fields you can customise:
var_groups:
name - A friendly name for the group of entity_vars.
entity_key - Entity to which the model belongs to, as defined in the project file. In our case we will set it to
user.vars - List of all the features that will be created.
entity_var - These are vars evaluated from which one can select all that should be added as
featuresin final output table. Each entity_var has aselectquery by which you are computing,fromthe source table from which var is evaluated, storing the result inname.You can also optionally apply a
whereon this, as a SQL like clause.To apply a regular expression in computing a value, you can refer functions from a
macrodefined in the filemacros.yaml.Optional, a
descriptionof the computedentity_var.
input_var - They have a similar structure as
entity_var, except that they’re helper inputs, so they do not get stored in the final output table.
models:
name - Set this to name of the feature table you wish to create on the DW.
model_type - This should be set to
feature_table_model.entity_key - Entity to which the model belongs to, as defined in the project file. In our case we will set it to
user.features - From the above list of
entity_var, these are the the final entityvars that will be added as columns to output entity traits 360 table.
Note
Any entity_var that is not part of this features list are not stored in the final table, and are deleted after the job is run.
Creating Features Table
After saving the edited file, execute pb run command to materialize the Features Table.
On screen you’ll be able to see the table name created in the data warehouse, that you can view on its console, as described in above section Viewing Generated Tables.
Note
For detailed reference, check out the page Entity Traits 360.
SQL Template Models
You can also create models with custom SQL. Please refer to the SQL Template Models section.
Generated Table
As illustrated in Viewing Generated Tables, you can log in to warehouse and view the generated table(s).
Please use the same view name as the feature table model defined in the file profiles.yaml of the project.
Even if there are multiple material tables, the view will always point to the latest generated table.
Here’s what the columns imply:
<entity_name>_main_id: rudderID generated by PB. If entity_name is user then it’ll be named
user_main_id.valid_at: Date when the entry was created for this record.
first_seen, last_seen, country, first_name, etc. - All features for which values are computed.
Automate Scheduling
Check out the page on Scheduling.
Conclusion
On this page, we have shown you how to install pb and use it to create your first project. We hope that this has been helpful and that you can now start using pb to quickly stitch together your data and create a 360 table of your customer. This is just a brief overview, there are many more features and commands available, so be sure to check out the complete documentation for more information.